How to Hang a Baby Canopy: Safety Tips + Successful Decor
You want to create a soothing cocoon for your child, but you wonder how to hang a canopy securely without making a mistake? This guide presents you with the most reliable fixing solutions, from classic ceiling drilling to clever adhesive alternatives that leave no trace. Discover our tips for choosing the ideal location, guaranteeing absolute safety above the crib and instantly enhancing the bedroom decoration through a perfectly controlled installation.
Prepare your project: the right canopy and the best location
The choice of fabric changes everything about the room's atmosphere. A light linen veil brings a very airy feel, while denser materials like cotton create a real cocoon. It's a notable difference.
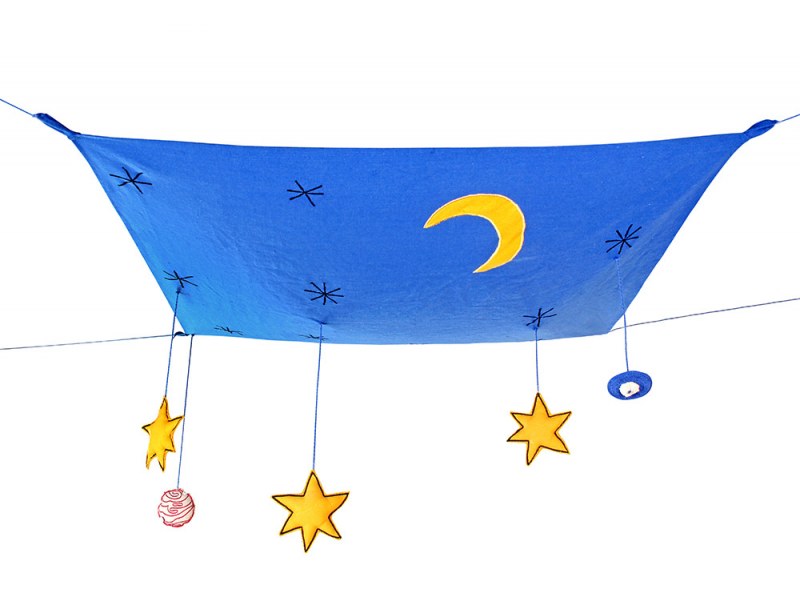
Also think about the style in connection with the bedroom decoration. For example, ababy canopy with a universe theme creates an immediate dreamlike atmosphere. It's a real decorative plus. Note that Chambrekids models are 100% cotton.
Finally, let's address the size of the canopy. You need to check that the canopy is large enough to drape nicely around the bed. This applies to cribs as well as adult beds.
Looking for how to hang a canopy? Two options define the ideal location. Either centered for a "cascade" effect, or above the headboard for a more targeted look.
For a crib, always place it towards the headboard so that the fabric doesn't risk falling on the child. This is a safety rule. You can discover why to put a canopy for baby here. This often reassures parents.
Take a measuring tape and mark the chosen fixing point with a simple pencil. This is a quick step that prevents drilling mistakes.
The type of canopy (material, color)
The exact location above the bed
The nature of your support (ceiling, wall, bed structure)
Ceiling mounting: the classic method with or without drilling
Now that you have your model in mind, let's get to action to know how to hang a canopy. Ceiling mounting is the most common, but even there, you have options.
Option 1: install a hook by drilling into the ceiling
This is the most robust and durable method. You have the guarantee of an installation that won't budge.
Use a stud finder to locate a solid area. Drill a pilot hole then insert an anchor suitable for the ceiling type, particularly a drywall anchor if applicable.
Screw the hook in fully to lock it. Pull on it firmly to test its strength before hanging our Chambrekids canopies.
Your equipment for fixing with drilling: A measuring tape and a pencil
A stud finder (recommended)
A drill with the right bit
An anchor suitable for your ceiling
A screw-in hook
Option 2: the quick solution without holes with an adhesive hook
Opt for mounting without drilling. This is the perfect solution for renters or those who dread making holes in their ceiling.
Focus on surface preparation. The ceiling must be perfectly clean, dry and degreased. Old or fragile paint could unfortunately flake under the weight.
You need to press the adhesive hook firmly. Then respect the setting time indicated by the manufacturer before hanging the canopy.
Alternatives to the ceiling: wall mounts and bed rods
The ceiling is not your only option, far from it. If these methods don't suit you, there are equally elegant and practical alternatives.
Use a wall mounting bar
Imagine a small bar, similar to a curtain rod, that attaches directly to the wall. This is the principle of this support.
This bar is placed on the wall, just above the headboard. It's a different approach that requires the same rigor as fixing a headboard. It clears the sleeping area.
This solution is very suitable for single beds or children's beds. The result is different, creating a "crown" effect above the head. It's a very aesthetic option.
Choose a bed rod, the ally of cribs
The bed rod is the ideal support for cribs and barred beds. It's an accessory designed for this purpose, guaranteeing a secure installation.
Its operation is simple. It's a freestanding support that clips onto the bed posts or rests on a base on the floor, so no holes to make. Your walls remain intact.
Its main advantage lies in its mobility. If you move the crib, the bed rod follows effortlessly.
Custom solutions: special beds and final decorative touches
What if your bed has a particular shape? No worries. Let's see how to do it before adding the finishing touch that will make the difference.
How to adapt the canopy to an existing structure?
Do you have a cabin bed or a Montessori structure? These wooden structures are ideal for integrating a canopy without drilling.
The simplest solution? Drape the fabric directly over the roof. Otherwise, attach the hoop to the structure with pretty ribbons or cords.
For models without a hoop, another trick exists. Use small discreet hooks or fabric ties to hang the veil from the wooden posts.
The finishing touch: enhance your installation
Once the canopy is in place, the most fun begins: personalization. Your child will love it.
Here are some ideas to create a magical element. This is the time to be creative. This detail changes everything when looking for how to hang a canopy with style.
LED string lights (battery-powered for safety)
Decorative butterflies or stars to stick in the veil
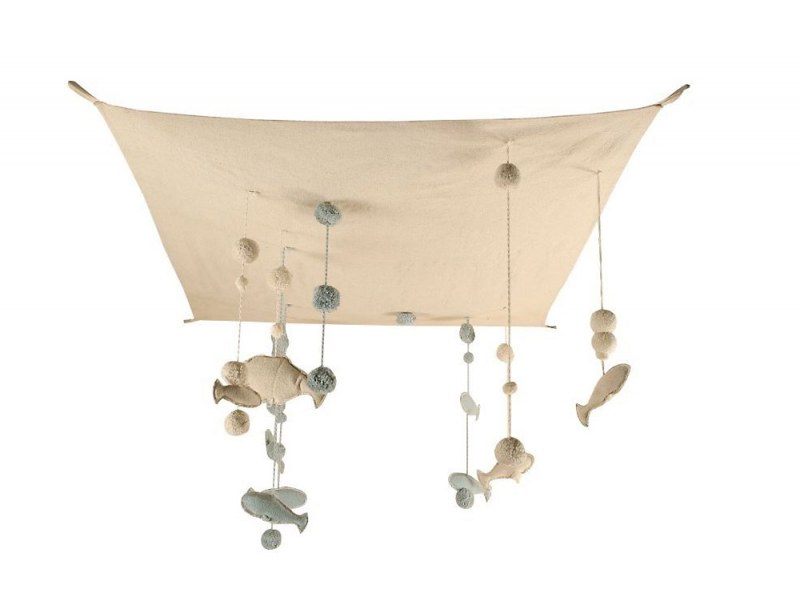
Colored pompoms for a bohemian touch
A beautiful tieback to hold the fabric
These details transform the bed into a real cocoon. They allow you toperfect your child's bedroom decoration with taste, creating a soft atmosphere conducive to dreams.
Hanging a canopy is ultimately child's play with the right method. Whether suspended from the ceiling or on a rod, this accessory instantly transforms the atmosphere. You now have all the keys to create this cocoon of softness and offer peaceful nights.


 What Age for Bunk Bed: Standards and Safety
 When to put baby in their room: age and transition
 Best Choice for Baby: Bed Attached to Parents or Next to Them?
 The convertible bed: furniture that grows with your child
 The bunk bed with storage and desk: discover its advantages!